‘OpenManage’ is a software product line from Dell that provides remote centralized management of your Dell hardware endpoints, including servers and workstations. They offer a number of different versions with different features and price points, but this article will be covering Dell OpenManage Essentials (OME). Dell OpenManage Essentials is the free version of OpenManage, but includes a number of helpful features including BIOS/Firmware upgrades, iDrac management, etc.
Environment Context
- Server: Windows Server 2016
- OME: v2.4 A00 (however v2.5 appears to be the latest)
Download the Installer
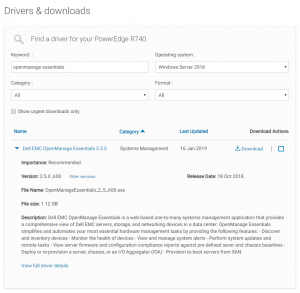
Perhaps the easiest way to download the OME installer is:
- Navigate to Dell’s support site
- Enter the service tag of one of your Dell endpoints (like a Poweredge server)
- Click Drivers and Downloads
- Search for ‘openmanage essentials’
Installation
If it is not already, copy the installer to the local server and run the .exe.
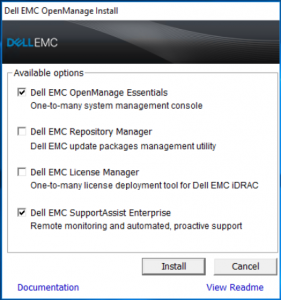
I accepted the default values when prompted:
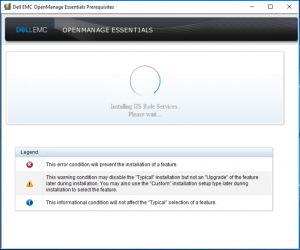
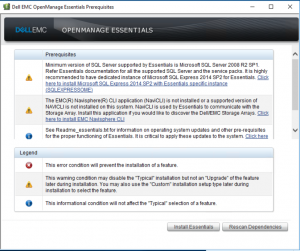
More than likely, the server you are installed OME in will be missing several dependencies that OME needs. However, the installer will identify the missing dependencies and offer to install them automatically for you.
Review the list of missing dependencies and click ‘Install All Critical Prerequisites’. Wait for the dependencies to install. Once completed, click ‘Install Essentials’:
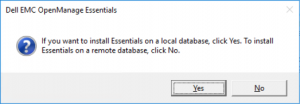
OME requires a backend databaes to store data on available updates and registered devices. You can select either a remote database (if you have one) or opt to have the installer provision a local SQL Express database. For this instance of OME, I opted to install a local SQL Express database.
Select ‘Yes’ to install the local SQL Express database and wait for the installation to complete.
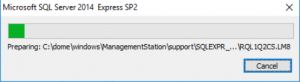
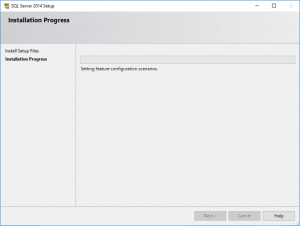
Once the SQL Express instance has been provisioned, you will return to the ‘prerequisites’ screen. Click ‘Install Essentials’.
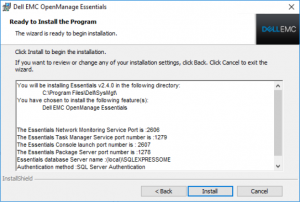
Walk through the installation wizard:
- Accept the EULA
- Verify selected settings
- Click Install
Once the installation is completed, check ‘Launch Dell EMC OpenManage Essentials’ and click Finish.

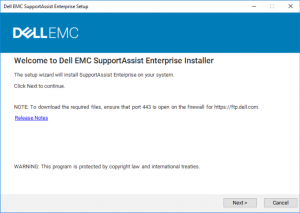
Since the default installation settings included the installation of ‘Dell EMC SupportAssist Enterprise’, a new installation wizard will appear to walk you through the installation. Just accept defaults.
Once the Dell EMC SupportAssist Enterprise installer has finished, open your new OME instance in a browser. The URL will be your equivalent of:
https://<web-server-name.domain.com>:2607/Web/Default.aspx
NOTE: The OME web application is written in Silverlight, so I’ve had the best luck in accessing it with Internet Explorer.
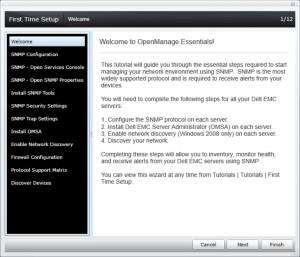
Walk through the browser-based wizard and configure your server according to your organization’s requirements. In my environment, I enabled an LDAPS connection to our local Active Directory.
Source Catalog Settings
The ‘Source catalog’ is Dell’s published repository that OME will read to pull the list of available BIOS/firmware updates.
You can configure the source catalog at:
Manage -> System Update -> Select a Catalog Source
The source catalog I have been using is:
https://downloads.dell.com/catalog/catalog.cab
You can initiate a download of the source catalog by clicking ‘Get the Latest’
Device Targets
The OME server can point to a number of different kinds of targets. The vast majority of my Dell servers are running ESXi and the primary purpose of this OME server will be firmware updates, so I connected to my servers using their iDrac addresses.
Troubleshooting iDRAC endpoints that do not connect properly
Technically, you should be able to install an ActiveX plugin for IE on your local workstation to use the troubleshooting tool locally, but I was unable to get it installed properly, so I remotely connected to the OME server.
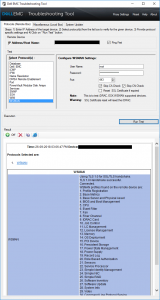
Open the Troubleshooting Tool:
![]()
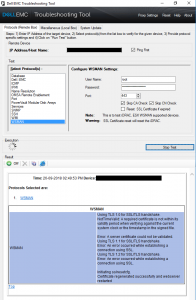
To test an iDRAC connection:
- Select WSMAN as the protocol
- Enter the DNS address for the iDRAC
- Enter the root password for that specific iDRAC.
- Optionally check ‘Skip CA check’, depending on the certificate status of the iDRAC target.
- Click ‘Run Test’ and wait
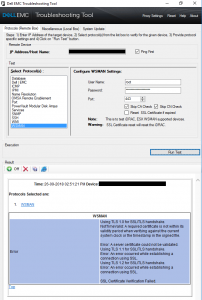
The above error is due to an expired self-signed certificate on the iDRAC. Luckily, the tool provides a method to renew the self-signed certificate to get the iDRAC connected to DOME. Check the box ‘Renew SSL certificate’ and re-run the test:
If you re-run the test again, the troubleshooting tool should pull WSMAN data: