This article explains how to migrate a running VM from one host to another without vMotion and with as little downtime as possible.
Context
As part of a recent round of hypervisor hardware upgrades, I needed to migrate a production VM from one hypervisor to another. While this would normally be a trivial task with vMotion, vMotion was not an option for this specific migration. Since this VM hosted a 24/7, customer-facing service, downtime on this VM needed to be kept to a minimum. I began weighing my options, and eventually found Veeam’s Quick Migration feature.
Veeam Quick Migration Methods
‘Migration’ is a loose term here. This is really more of a ‘clone & swap’. Terminology aside, however, this is a really cool feature that works really well – and it’s free!
Official Veeam Documentation for Quick Migration: https://helpcenter.veeam.com/docs/backup/vsphere/quick_migration.html?ver=95u4
Quick Migration can migrate a VM using one of two methods:
- Hot VM migration, using SmartSwitch. If your migration context is compatible, this is a zero down-time migration. See the linked article above for more information.
- Cold VM migration. If SmartSwitch is not a possibility, this migration method only sees brief downtime.
In my context, the CPU architectures of the source and destination hypervisors differed, which means I had to process a cold VM migration. I detail the entire process below.
Cold VM Migration Procedure
During the migration of my VM, the following occurred:
- The original VM was snapshotted, but kept powered on and in-service throughout the first 95% of the migration.
- A new VM is created on the destination hypervisor with identical configurations as the original VM, but this new VM is kept powered off.
Notable Differences between these two VMs:
1. The MAC addresses are different. Since the MAC address is tied to the VM object itself, and a new VM object has been created, vSphere just selects a new MAC address for the new VM.
2. The new VM’s name is (temporarily) set to [original_vm_name]_[random_characters] - While the original VM is still running, data from the original VM is copied to the new VM
- Once the original VM’s data has been copied to the new VM, the original VM is shut down. This is the start of your brief downtime.
- Any changes that had been written to the original VM after it was snapshotted (and thus written to it’s snapshot file) are now written to the new VM.
- The original VM is renamed to [original_vm_name]-migrated.
- The new VM is renamed to [original_vm_name]
- The new VM is powered on and should immediately be able to pick up where the original VM left off (unless the MAC address needs to be changed).
Cold VM Migration Statistics
Your context will of course be different, but in my specific context:
- Migrated VM size: > 300GB
- Total migration time: 30 minutes
- Total downtime: 10 minutes
Validate Dependencies
First of all, we need to validate dependencies on the destination hypervisor. These include:
- All necessary network configurations (vSwitches, Port Groups, etc.) are configured
- Enough storage is available for the VM to be migrated
- Enough resource overhead (CPU, Memory) is available for the VM to be migrated
- Make note of the VM’s original MAC address before migrating it, in case any applications installed on the VM are tied to the MAC address, or your organization has stringent networking rules.
Migrating a VM with Veeam Quick Migration (Cold VM Migration)
The following are the specific steps I took to migrate my VM using Veeam’s Quick Migration.
- Validate all of the dependencies listed above.
- Open the Veeam Console
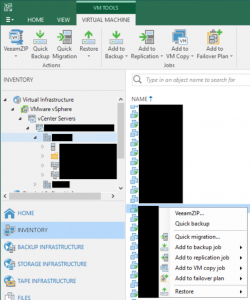
- In the inventory section, expand your vSphere hierarchy until you find the VM you need to migrate.
- Right-click the VM and select ‘Quick Migration’:
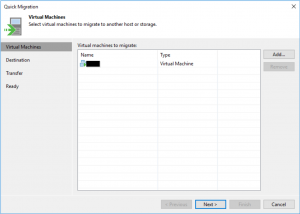
- Verify the correct VM is populated in the list of VMs to be migrated:
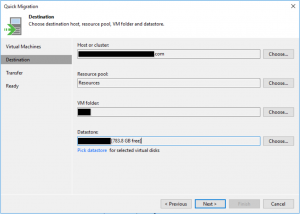
- Specify the destination server settings, including the host, resource pool, VM folder and datastore:
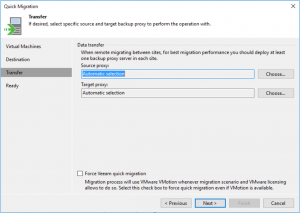
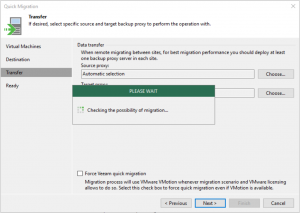
- Depending on the layout of your organization’s Veeam Backup and Replication environment, select the appropriate proxies, or just leave them as automatic:
- After clicking ‘Next’, Veeam will do its own validation to make sure that all of the dependencies for the migration are in place:
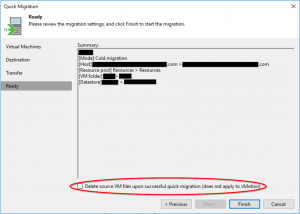
- If Veeam successfully verifies that the migration is possible, review your settings and click Finish.
Important note: I would heavily recommend that you leave the ‘Delete source VM files upon successful migration…’ check box at the bottom of the window un-checked. The final result of a cold migration is the original VM being renamed and powered off, but in the event an issue is detected with the new VM, this gives you the option of rolling back to the original VM quickly.
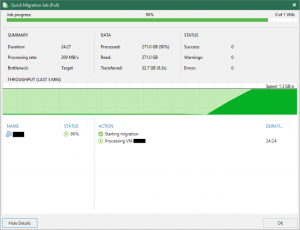
- Once the quick migration has been started, you can watch the progress as you would any other backup job in the Veeam console:
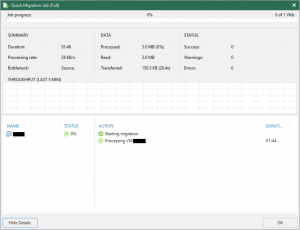
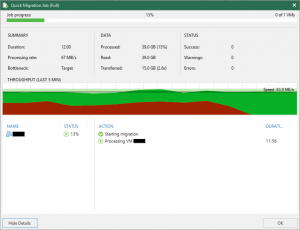
- Wait for the migration to complete. Again, the final result will be a new VM on the destination hypervisor with the original VM’s name, and the original VM will have been renamed [original_vm_name]-migrated and powered off.
New VM First Boot
My migration completed without issue, and the only thing I noticed when the new VM was booting up was that Windows wanted to run a chkdisk, which completed without errors.
I ended up needing to change the MAC address of the new VM to the MAC address of the original, which was a simple fix.