Smartcards are physical tokens that can be used in place of a standard password and provide 2FA (2 Factor Authentication):
- Something you have – the smartcard token
- Something you know – the smartcard PIN
Using 2 Factor Authentication has been proven to be a safer and more secure method to access your accounts.
This article explains how to configure Smartcard authentication against a Linux DE, or Desktop Environment, including the generation of a Kerberos TGT (Ticket Granting Ticket) during logon.
This configuration took me a while to get just right, and I wanted to include my working setup to help anyone else who may be looking for this kind of solution.
This setup requires a ton of moving parts, which I have attempted to explain in detail in each section below.
- Joining an Active Directory domain
- Configuring Smartcard Recognition on the Linux Client
- Configuring SSSD
- Configuring the Smartcard
- Configuring Kerberos (PKINIT)
- Configuring Linux PAM and Domain User login
Test Environment Context
Note that freeIPA is not included in this test setup. Our Linux client is being connected directly to Active Directory.
My test environment looks like the following:
- Active Directory Domain Functional Level: 2016 with Active Directory Certificate Services (internal Enterprise PKI)
- Linux Client: Ubuntu 18.04 LTS
- Smartcard: Yubikey 5 NFC
Dummy variables used below:
(Use your environment’s AD domain/Kerberos realm in place of these placeholders)
- Active Directory domain: addomain.com
- Active Directory Kerberos realm: ADDOMAIN.COM
- Domain User account: enduser (or enduser@addomain.com)
Note about Active Directory Domain/Kerberos realm
Since Windows 2000, Kerberos has been the authentication protocol of choice for Windows-based networks, replacing NTLM. Active Directory itself publishes a Kerberos Realm, which our Linux client connects to and uses to access authentication resources in the Active Directory database.
Once properly configured, our Linux Client can request (manually and automatically) TGTs from the Kerberos KDC (Key Distribution Server), which can be used to access network resources using single sign on. For example, you could seamlessly access Windows network shares from your Linux Client without being prompted to log in.
From a client-side configuration perspective, the Kerberos Realm is usually specified using all capital-letters (e.g. ADDOMAIN.COM), although this is not always the case.
Join the Domain
First, we need to join our Linux Client to the domain. This allows us to log into our Linux client with domain users and also results in an Active Directory computer object being added to our Active Directory database.
Verify SRV record lookup
Before you begin setup, you need to verify that your Linux client is able to lookup the LDAP SRV Record for your Active Directory domain.
dig -t SRV _ldap._tcp.addomain.com
If dig is unable to retrieve the domain controller(s) in your Active Directory environment, review the DNS records on your DNS server.
Install realmd
sudo apt install -y realmd
‘realmd’ is used to identify and join Kerberos realms. It also lists all required package dependencies required to do so.
Discover available Kerberos realms and list package dependencies
realm discover

addomain.com
type: kerberos
realm-name: ADDOMAIN.COM
domain-name: addomain.com
configured: no
server-software: active-directory
client-software: sssd
required-package: sssd-tools
required-package: sssd
required-package: libnss-sss
required-package: libpam-sss
required-package: adcli
required-package: samba-common-bin
Install realm join package dependencies
sudo apt install -y sssd-tools sssd libnss-sss libpam-sss adcli samba-common-bin
Join the AD Kerberos realm
sudo realm join addomain.com --user=<Domain Admin username. Domain declaration is not needed>
Install Kerberos commandline package dependencies
sudo apt install -y krb5-user
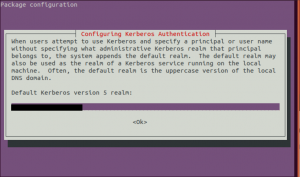
This package allows us to use the kinit and klist commands for validation and troubleshooting. If you are prompted for a Kerberos domain during installation, specify your environment’s equivalent of ADDOMAIN.COM.
Validation – Domain User Lookup
This command should return an ‘ephemeral’ passwd entry that matches the Domain user ‘enduser’. Domain users will typically not have entries under /cat/passwd.
getent passwd enduser
Validation – Request TGT for Domain user
This command requests a TGT for the user enduser@addomain.com
kinit enduser@addomain.com
This command displays all Kerberos tickets on the system. You should see a ‘krbtgt’ for the ‘enduser’ domain user.
klist
Configure Smartcard Logon
If all verification checks above passed, we now need to configure our Linux client to recognize Smartcards.
‘nssdb’ is the nss database used by nss (Name Switch Service) to check for local PKCS#11 authentication tokens.
Install nssdb package dependencies
This package includes tools to modify and query the nssdb.
sudo apt install -y libnss3-tools
Create a new nssdb
cd /etc/pki && sudo mkdir nssdb
sudo certutil -N -d nssdb --empty-password
Install Root and Intermediate Certificates
The Root and Intermediate certificates used to sign the certificate that will be loaded onto your smartcard must be added to the nssdb. This allows the nss service to validate your smartcard certificate.
In my environment, this means installing the root and intermediate certificates for the AD CS (Active Directory Certificate Services) servers. If you use an external PKI provider (GoDaddy, Digicert, etc.), you will need to download and install their root certificate.
For each certificate:
sudo certutil -d /etc/pki/nssdb -A -n 'CA-ROOT-CERT' -t CT,CT,CT -a -i /path/to/CA-ROOT-CERT.pem
You can view which certificates have been installed in your nssdb with the following command:
sudo certutil -L -d /etc/pki/nssdb -h all
Install Smartcard Package Dependencies
This package allows your Linux Client to read smartcards.
sudo apt install -y opensc
Create a symlink for the opensc-pkcs11.so library
I had to create a symlink for the opensc-pkcs11.so library under the /usr/lib directory in order to complete the following steps.
sudo ln -s /usr/lib/x86_64-linux-gnu/opensc-pkcs11.so /usr/lib/opensc-pkcs11.so
Add the opensc-pkcs11.so library to nssdb
This allows the nssdb to read your smartcard.
sudo modutil -dbdir /etc/pki/nssdb -add "OpenSC" -libfile opensc-pkcs11.so
You can validate that the openSC library has been added to the nssdb with the following command:
sudo modutil -dbdir /etc/pki/nssdb -list
Note about validation steps below: If you have not installed a smartcard certificate on your smartcard yet, skip this validation step for now, as there is no certificate to be read.
Validation – Read public certificate from your smartcard
A lot of instructions I found online used the following command:
sudo /usr/libexec/sssd/p11_child --pre --nssdb=/etc/pki/nssdb
However, on my test system, ‘p11_child’ was not at this specified location.
locate p11_child
/usr/lib/x86_64-linux-gnu/sssd/p11_child
So the following command worked for me instead:
sudo /usr/lib/x86_64-linux-gnu/sssd/p11_child --pre --nssdb=/etc/pki/nssdb

PIV Card Holder pin (PIV_II)
opensc-pkcs11.so
01
Certificate for PIV Authentication
MIIFqjCCBJKgA...
I could have set up a symlink to bridge this gap, but since this command was just being used for validation, I decided to move past it.
Configure SSSD
System Security Services Daemon is a package that provides our Linux client with access to local and remote authentication systems. It also allows us to cache authentication data for offline access of our Linux client.
Installing SSSD and it’s dependencies should create the /etc/sssd/sssd.conf file with default values. My working SSSD configuration file looks like this (I have grouped like-settings together to make the file easier to read):
[sssd]
domains = addomain.com
config_file_version = 2
services = nss, pam

[domain/addomain.com]
ad_domain = addomain.com
krb5_realm = ADDOMAIN.COM
realmd_tags = manages-system joined-with-adcli
access_provider = ad
id_provider = ad
ldap_id_mapping = True
#
cache_credentials = True
krb5_store_password_if_offline = True
#
use_fully_qualified_names = False
default_shell = /bin/bash
fallback_homedir = /home/%u@%d

[pam]
pam_cert_auth = True
A few notes about the configuration above:
services = nss, pam
We are telling SSSD to use nss (Name Switch Service, which connects to Active Directory on SSSD’s behalf) and pam (Pluggable Authentication Module) authentication resources.
cache_credentials/krb5_store_password_if_offline = True
These settings enable caching of authentication data, which allows us to access our Linux client when offline.
use_fully_qualified_names = False
This setting can be set according to your preferences. By setting this to ‘False’, you will be able to access Domain resources (e.g. login names) without specifying a fully qualified name format. In other words, I could log in as ‘enduser’ instead of ‘enduser@addomain.com’.
default_shell = /bin/bash
This specifies the default shell for new users that SSSD allows us to log in as. If you have specified POSIX values on your Active Directory users, those values will take precedence over whatever value is specified for ‘default_shell’. In my environment, my users have specified POSIX values, but I leave this configuration setting (which matches my AD POSIX values) as a fall-back, just in case.
fallback_homedir = /home/%u@%d
Same as above, but this specifies the default homedirectory if a POSIX value has not been specified in Active Directory. You can set the format of the new user’s home directory several different ways. Some examples:
- /home/%u@%d = /home/enduser@addomain.com
- /home/%d/%u = /home/addomain.com/enduser
- /home/%u = /home/enduser (note that the ‘addomain’ does not have to be included anywhere in the user’s home directory path)
pam_cert_auth = True
This setting tells SSSD to check for, validate and allow certificate authentication against our configured authentication resources (Active Directory).
Create the required pam_preauth_available file
This file is required for SSSD to use a smartcard to authenticate against Active Directory.
sudo touch /var/lib/sss/pubconf/pam_preauth_available
Restart SSSD after making changes
sudo systemctl restart sssd
Configure Smartcard
Certificate Parameters
You will need to load a certificate on to your smartcard using whichever method your smartcard model supports. The context of this article is authenticating against a local Active Directory domain with AD CS installed, so I was able to enroll a certificate onto my Yubikey 5 NFC using the native smartcard enrollment tools built into Windows. I plan on eventually writing an article on how this is set up and link it here.
In general, the certificate will need to have the following features:
- Key Usage: Digital Signature, Key Encipherment
- Extended (or Enhanced) Key Usage: Client Authentication (1.3.6.1.5.5.7.3.2), Smart Card Logon (1.3.6.1.4.1.311.20.2.2)
- Subject Alternative Name entry which matches the UPN of the Domain User
The certificate also needs to exist in the ‘userCertificates’ attribute of the Domain User. This can be accomplished by default when requesting a certificate from an Active Directory Certificate Services using a template that is configured to do so.
**Before generating your smartcard certificate, I recommend you read the PKINIT/PKINIT Certificate Requirement section below to see a big gotcha that I ran into while testing.
Smartcard Configuration
If you have not already done so, configure the PIN, PUK and management key (if applicable) on your smartcard. You will need to know your smartcard’s PIN when validating your configuration later.
Configure PKINIT
PKINIT is the package that allows you to request Kerberos TGTs using PKI (X.509 certificates). Without PKINIT properly configured, you could still theoretically authenticate against your Linux client using a smartcard certificate, but you will not have a Kerberos TGT automatically requested and stored on the Linux client.
For integration into Windows-based environments, this can be a hassle and breaks the feeling of a ‘seamless integration’ of your Linux client into the Windows-based environment. This would also defeat the purpose of using a smartcard, as a password would be required when requesting a TGT using ‘kinit’.
Official documentation for PKINIT can be found here: http://web.mit.edu/kaduk/Public/doc/admin/pkinit.html
Install PKINIT package dependency
sudo apt install -y krb5-pkinit
Configure PKINIT
Configuration for PKINIT is added to the /etc/krb5.conf configuration file.
My working /etc/krb5.conf configuration file:
[libdefaults]
default_realm = ADDOMAIN.COM
pkinit_kdc_hostname = addomain.com
pkinit_anchors = DIR:/etc/ssl/ca-pem/root/
pkinit_pool = DIR:/etc/ssl/ca-pem/sub/
pkinit_identities = PKCS11:opensc-pkcs11.so:slotid=0:certid=01
default_ccache_name = KEYRING:persistent:%{uid}
canonicalize = True
...
Getting PKINIT configured correctly was the most difficult step of this process. I will explain the settings in my configuration below:
pkinit_kdc_hostname = addomain.com
If you are authenticating against an Active Directory kerberos realm, you can set ‘pkinit_kdc_hostname’ to your environment’s equivalent of ‘addomain.com’. You do not need to specify each individual domain controller (KDC server).
pkinit_anchors = DIR:/etc/ssl/ca-pem/root/
You need to point to either a .pem file or a directory containing a .pem file where the Root Certificate over your Kerberos environment lives. In my environment, this is the Certificate for the AD CS Root CA server.
This setting can be specified with either ‘DIR:’, which points to a directory containing the .pem, or a ‘FILE:’, which points to the file specifically. You can place this .pem file wherever you want – the directory provided above is just an example.
pkinit_pool = DIR:/etc/ssl/ca-pem/sub/
You need to point to a .pem file or directory containing .pem files for the Intermediate (or sub) CA certificates over your Kerberos environment. In my environment, this is the certificates for our intermediate/sub CAs, whose certificates were signed by the AD CS Root CA server.
This was one of the gotcha’s I ran into while testing PKINIT, as I was placing the root and sub CA certificates in a directory and pointing ‘pkinit_anchors’ to it.
pkinit_identities = PKCS11:opensc-pkcs11.so:slotid=0:certid=01
If your smartcard has multiple certificates, PKINIT will fail during a TGT request, as it is only expecting a single certificate. To specify a specific certificate on your smartcard, you need to specify an identifier like above.
You can use either ‘pkcs11-tool’ or ‘pkcs15-tool’ (command included in the opensc package) to identify which slotid and certid points to your certificate.
Tip about Yubikeys: The ‘PIV’ application on your Yubikey is always considered ‘slotid=0’ from the perspective of PKINIT. The certid value is the piece you need to identify.
default_ccache_name = KEYRING:persistent:%{uid}
This setting tells Kerberos where to store tickets on the local system that have been granted from the KDC. By default, the cache is located under FILE:/tmp/krb5cc_%{uid}. However, due to a bug with PKINIT, TGTs that are successfully granted by the KDC are written to this file with root:root permissions, which means your standard ‘enduser’ will be unable to access the cache that contains their TGT.
Because of this, I specified ‘KEYRING:persistent:%{uid}’ so that the cache would be written to the keyring instead. One important note about this is if an environment variable for KRB5CCNAME is already set, that value will have a priority over whatever you set for ‘default_ccache_name’. The fix for this is to ‘reset’ the environment variable, using the following command:
unset KRB5CCNAME
Now when the environment variable is built, it will use the value of ‘default_ccache_name’ permanently moving forward.
This bug is resolved in a later version of SSSD than what is available in Ubuntu 18.04’s repositories.
canonicalize = True
Supposedly when pkinit makes a request to an Active Directory Kerberos realm with ‘ADDOMAIN.COM’, AD will reply with a ticket using ‘addomain.com’ as the realm, which PKINIT does not expect and causes it to throw an error. The workaround for this behavior is to set ‘canonicalize’ to true, so that PKINIT accepts what it considers ‘malformed’ replies.
PKINIT Certificate Requirement
The PKINIT certificate is the one used to validate the user when requesting a TGT using PKI. You can use the same ‘smartcard login’ certificate mentioned above, but there are a few important details to understand about the kind of certificate you can use:
ECC Certificates
In order to use an ECC (Elliptic Curve Crytography) certificate, the KDC’s certificate also needs to be an ECC certificate. This is recorded in Microsoft’s PKCA for PKINIT documentation:
For ECC support, the KDC has an ECC public key certificate issued by a CA and trusted by clients in the Kerberos realm
RSA Certificates
This is specific to Yubikeys, but may be relevant for other smartcard tokens as well. The PIV application on Yubikeys do not support 4096 RSA keys. You will be unable to generate an RSA 4096 key or load one onto the smartcard. This is because support for RSA 4096 for PIV was removed by the NIST, so it is no longer an accepted standard. Because of this, an RSA 2048 certificate will need to be used, unless your KDC servers have ECC certificates (see above).
Configure Linux PAM and Domain User Login
The Linux PAM (Pluggable Authentication Module) is Linux’s centralized authentication mechanism, which allows different services and applications to use the same authentication source. This prevents each service/application from having to maintain its own separate authentication method.
Now that we have configured all of the other required modules for smartcard authentication with PKINIT, we need to tell PAM to use SSSD for various types of system authentication, including system login, sudo, su, etc. We also need to enable automatic creation of home directories for domain users and give our Domain user sudo access to the system.
Enable Automatic creation of home directories
Modify the bottom of /etc/pam.d/common-session to look like the following:
...
# and here are more per-package modules (the "Additional" block)
session required pam_unix.so
session optional pam_sss.so
session required pam_mkhomedir.so skel=/etc/skel/ umask=0022
session optional pam_systemd.so
# end of pam-auth-update config
‘session required pam_mkhomedir.so skel=/etc/skel/ umask=0022’ enables this feature. Note that the ‘skel’ and ‘umask’ values are the defaults and do not need to be included. I have added them here for completion.
Give your enduser domain account sudo permissions
usermod -aG sudo enduser
Reboot the system and log in as your Domain user
In my experience, in order for automatic home directory creation to work properly, a system reboot is required.
Once the system boots, if you have not disabled the user list on the gdm3 login page, click ‘Not Listed?’, and depending on what you chose to set ‘use_fully_qualified_names’ to in /etc/sssd/sssd.conf, enter either:
enduser -or -enduser@addomain.com
and provide your the domain user’s password. The system should create your home directory and log you into the system.
Test Smartcard Authentication with sudo
I would highly recommend that you test this configuration with just ‘sudo’ before applying it to your entire system. If your configuration is not correct, you could lose permanent access to your system.
Open a second terminal window and elevate to root (sudo -i). Keep this window open and separate from the one you follow the next step with, so that you have an elevated terminal which you can revert your PAM configuration in if something unexpected happens.
In a second terminal window, add the following line to /etc/pam.d/sudo before the @include’s:
auth sufficient pam_sss.so
Open a third terminal window and attempt to elevate to root (sudo -i). You should be prompted to enter your PIN to unlock the smartcard. Once the correct PIN is entered, you should be elevated to root.
Once you have validated that your smartcard can be used to authenticate against Active Directory, remove the configuration line above from /etc/pam.d/sudo and make the following changes to /etc/pam.d/common-auth:
...
# here are the per-package modules (the "Primary" block)
auth [success=2 default=ignore] pam_sss.so forward_pass
auth [success=1 default=ignore] pam_unix.so try_first_pass nullok_secure
# here's the fallback if no module succeeds
...
The ‘common-auth’ PAM module is included for most authentication mechanisms, including sudo, su, system login, etc., so in a sense, this is a ‘global’ change.
Explanation of PAM configuration
Our configuration (SSSD, PAM, PKINIT, etc.) will provide the following behavior when we attempt to authenticate:
Smartcard is present, Domain User login:
- First attempt smartcard authentication (pam_sss.so)
- If the certificate on the smartcard is valid for the domain user, the system prompts the user for their PIN
- If the PIN is correct, grant the user access to the system
- If the PIN is not correct, prompt the user for their PIN again. Note that after 3 incorrect PIN attempts, Yubikeys become locked and the PUK will be required to unlock it.
Smartcard is present, local user local:
- First attempt smartcard authentication (pam_sss.so)
- The certificate on the smartcard is not valid for the user (local user), so they are prompted for their password.
- The user provides their password, which will of course not work for domain authentication. pam_sss.so ‘fails’, and pam_unix.so is executed next.
- Since ‘forward_pass’ was specified during pam_sss.so’s execution, the password was captured and added to the PAM stack, and is now automatically provided to pam_unix.so.
- If the password is correct, the user is granted access to the system.
- If the password is incorrect, start over at step #2.
Smartcard is not present:
- Smartcard authentication is not attempted, but pam_sss.so is executed
- Prompt the user for their password
- If the user is a Domain user, verify their password against Active Directory.
- If the password is correct, grant them access to the system
- If the password is incorrect, re-prompt them for their password.
- If the user is a local user, pam_sss.so ‘fails’ and pam_unix.so is executed.
- Since ‘forward_pass’ was specified during pam_sss.so’s execution, the password was captured and added to the PAM stack, and is now automatically provided to pam_unix.so.
- If the provided password is correct, grant the user access to the system
- If the provided password is incorrect, re-prompt the user for their password
This PAM configuration is flexible, and prompts for the appropriate authentication mechanism depending on the state of the smartcard and which user is being logged in as. This prevents local user logins from failing, or being prompted twice when trying to log into the system.
System Login and Validation of PKINIT
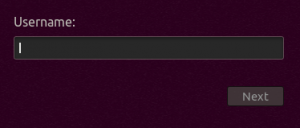
Now that PAM has been configured, and smartcard authentication will be attempted for logins with a smartcard inserted, log out of your domain user.
Enter your username when prompted, and the system should prompt you for a PIN:
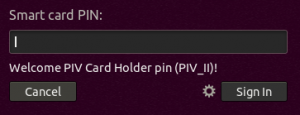
Enter your PIN. You should be granted access to the system.
Verify PKINIT automatically requested a Kerberos TGT
Open a terminal and enter:
klist
If PKINIT executed correctly, you should have a Kerberos TGT stored locally on the Linux client.
Helpful Troubleshooting Commands
Here are a handful of commands that I found useful while troubleshooting this setup.
Basic Kerberos commands
#Request a new TGT
kinit

#Request a new TGT for a specific user
kinit enduser@addomain.com

#List all local granted tickets
klist

#Remove all local granted tickets
kdestroy
Manual PKINIT request
This command attempts a kinit (TGT request) using the smartcard inserted into the system, and redirects KRB5 output to stdout. Essentially, you are replicating the behavior of PKINIT when logging into the system.
#single certificate on the smartcard
KRB5_TRACE=/dev/stdout kinit -X 'X509_user_identity=PKCS11:module_name=opensc-pkcs11.so'

#multiple certificates on the smartcard - specify which one
KRB5_TRACE=/dev/stdout kinit -X 'X509_user_identity=PKCS11:module_name=opensc-pkcs11.so:slotid=0':certid=01'
Export Public Key from Smartcard
Note: The name of your certificate may differ.
sudo certutil -L -d /etc/pki/nssdb -n 'PIV Card Holder pin (PIV_II):Certificate for PIV Authentication' -a
Clearing the local SSSD cache (probably will not be required if following this article)
#clear cache for a user
sss_cache --user enduser
#clear cache for a domain
sss_cache --domain addomain.com